2011 Toyota 4Runner Right Rear Brake Light Keeps Going Out – Causes & Fixes

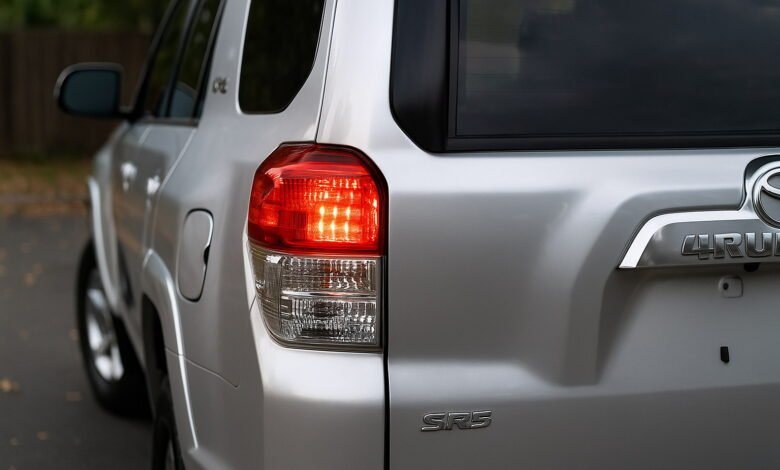
When your 2011 Toyota 4Runner’s right rear brake light keeps going out, it’s more than just a minor inconvenience. A malfunctioning brake light can result in traffic tickets, failed inspections, or worse — an accident. If you’ve found yourself replacing the same bulb repeatedly or wondering why only the right rear brake light is acting up, this comprehensive guide will walk you through the causes, fixes, and prevention strategies.
Introduction to the Problem
The Toyota 4Runner is known for reliability, especially in its 2011 model year. Yet, one recurring issue many owners report is the right rear brake light consistently failing. Unlike a simple bulb burnout, this problem often reappears even after replacement, leaving owners frustrated and puzzled.
This article breaks down the core causes, the mechanics behind the issue, and how to permanently resolve it. Whether you’re a DIY enthusiast or planning a shop visit, you’ll find clear steps and solutions here.
Symptoms of the Issue
Before diving into diagnostics, it’s important to recognize the tell-tale signs that something’s wrong with your brake light system. For the 2011 4Runner, the symptoms may include:
- Right rear brake light not turning on when the pedal is pressed
- Warning lights or messages on the dashboard (in some cases)
- The bulb working temporarily after replacement, then failing again
- Rear lighting looking dimmer or flickering
- Brake light working intermittently, especially after bumps
These symptoms suggest that the problem is not just the bulb itself — it could involve wiring, sockets, or other electrical components.
Possible Causes Overview
Let’s take a quick look at the common culprits behind a 2011 Toyota 4Runner right rear brake light going out repeatedly:
| Possible Cause | Explanation |
| Burned-out bulb | Simple wear and tear or use of low-quality replacement bulbs |
| Corroded socket | Moisture intrusion leading to poor contact or short-circuiting |
| Wiring issues | Frayed or disconnected wires causing power loss |
| Grounding failure | Poor or loose ground wires can cut off the brake light circuit |
| Bad brake light switch | Although less common, it can cause signal failure to one or all brake lights |
| Faulty fuse or relay | Electrical relay failures affecting brake light power distribution |
| Tail light assembly defect | Internal failures in the light housing itself (especially in older vehicles) |
Each of these components plays a role in the brake light’s functionality. Pinpointing the right one is key to fixing the issue permanently.
Faulty Bulb Issues
The first instinct when a brake light fails is to replace the bulb — and rightfully so. But if the new bulb dies within days or weeks, something more is at play.
Here’s what you need to know:
Types of Bulbs Used
The 2011 Toyota 4Runner typically uses a 3157 dual filament bulb for the brake/tail light function.
| Type | Specs |
| 3157 (Standard) | 12.8V, 26.9/8.3W, wedge base |
| 3157LL (Long Life) | Longer lifespan, lower heat |
| LED Upgrade | Lower power draw, cooler operation |
Why New Bulbs Fail
- Poor quality replacements: Cheaper bulbs often lack proper heat resistance or stable filaments.
- Incorrect installation: Twisting too hard or misaligning contacts can cause short circuits.
- Overheating: An overactive electrical current or poor ventilation can cause bulbs to burn out prematurely.
“Using OEM or high-quality bulbs is a critical first step. Poor-quality bulbs can fail regardless of the rest of the system being intact.” – Jason Landry, Auto Electrician, CarSavvy Repair Blog
Socket Corrosion or Damage
One of the most overlooked causes of brake light issues is the bulb socket itself.
How to Identify Socket Problems
- Burn marks or discoloration around the socket
- Corrosion on metal contacts inside
- Bulb fits loose or wobbly
- Water or condensation inside the tail light housing
Even if the bulb is new, a corroded or burned socket won’t allow proper electrical contact.
DIY Fix or Replace?
If corrosion is mild, you can:
- Clean contacts with electrical contact cleaner
- Use a small wire brush or sandpaper to remove oxidation
- Apply dielectric grease to prevent moisture buildup
If damage is severe, replace the socket or the entire tail light assembly to avoid repeat issues.
Wiring and Connector Problems
If the bulb and socket are both in good shape but the right rear brake light keeps going out, the issue might lie deeper — within the wiring harness or connectors.
Signs of Wiring Issues:
- Brake light flickers when driving over bumps
- Light works only when the tailgate is in a certain position
- Melted or brittle wires near the tail light
- No voltage at the socket when tested with a multimeter
How to Diagnose:
- Visually inspect the wiring harness from the body to the rear light. Look for frayed or pinched wires.
- Test voltage at the brake light socket using a multimeter. With the pedal pressed, you should read 12V+.
- Check continuity from the brake switch to the rear socket to rule out open circuits.
In some cases, rear liftgate movement stresses the wires over time, causing breaks inside the insulation. If wiring damage is confirmed, a splicing repair kit or full harness replacement may be required.
Brake Light Switch Malfunction
Though rare, a faulty brake light switch could cause issues even on one side. This switch is mounted above the brake pedal and triggers the lights when the pedal is pressed.
How to Identify Switch Issues:
- Both brake lights flicker or act erratically
- Brake lights stay on even when the pedal is not pressed
- Switch appears loose, cracked, or corroded
If only one side is affected, the switch is less likely the cause — but it’s still worth testing.
Testing the Brake Switch:
Use a multimeter to check for continuity when the switch is pressed. If the readings don’t change, replace the switch. OEM part numbers for the 2011 4Runner can be found in your service manual or at ToyotaPartsDeal.com.
Fuse and Relay Inspection
Another potential cause is a blown fuse or faulty relay related to the rear brake lights.
Relevant Fuses for the 2011 Toyota 4Runner:
| Location | Fuse Name | Amps | Function |
| Engine Bay Fuse Box | STOP | 15A | Controls brake lights |
| Interior Fuse Box | TAIL | 10A | Controls tail light system |
Check these fuses using a fuse tester or multimeter. If the fuse keeps blowing after replacement, you may have a short circuit downstream.
Also inspect brake light relays, though rare in this generation, and swap with a similar one to test.
Grounding Issues
Electrical grounding is critical for any lighting circuit to complete the flow of current. A loose or corroded ground in the rear brake light system will cause flickering or total failure of the light.
Where to Find the Ground:
On the 2011 4Runner, the rear ground point is typically located near the tail light housing or under the rear trim panel.
How to Fix It:
- Clean the ground point using sandpaper or a wire brush
- Reattach with a tight bolt and use dielectric grease
- Use a multimeter on continuity mode to confirm solid connection to chassis ground
Tail Light Assembly Faults
If everything checks out but the issue persists, consider the possibility of an internal defect in the tail light housing itself.
Common Tail Light Housing Issues:
- Internal circuit board damage (for LED-equipped versions)
- Water intrusion shorting internal components
- Cracks or warping causing misalignment of sockets
Case Study:
A 2011 Toyota 4Runner owner on a popular forum reported replacing three bulbs within six months. On disassembly, moisture buildup was found inside the tail light. Replacing the tail light assembly resolved the issue permanently.
OEM Part Number (Right Rear Assembly): 81581-35290
Estimated Cost: $125 – $220 depending on retailer
Recalls or TSBs (Technical Service Bulletins)
Sometimes, the issue isn’t just yours. Always check for recalls or TSBs from Toyota.
How to Check:
- Visit NHTSA.gov/recalls
- Enter your 17-digit VIN number
- Look for anything related to brake lights, tail lights, or electrical
As of now, there are no official recalls specific to the 2011 4Runner’s right rear brake light. However, a Technical Service Bulletin (TSB-0043-11) addresses rear lighting harness concerns. You can request a printout of all TSBs from your local dealership.
Step-by-Step Troubleshooting Guide
Here’s a quick DIY troubleshooting roadmap to follow in order:
- Replace the bulb with a quality OEM or LED alternative
- Inspect and clean the socket
- Test for voltage at the socket with pedal pressed
- Check ground continuity
- Inspect wiring harness for cracks or frays
- Check related fuses and relays
- Swap brake light switch if all else fails
- Replace tail light assembly as a last resort
Prevention Tips for Future Failures
After resolving the issue, it’s wise to take steps to prevent a repeat.
Tips:
- Use OEM-grade bulbs and avoid no-name brands
- Apply dielectric grease to sockets when replacing bulbs
- Seal any cracks in the tail light housing to prevent moisture
- Periodically inspect rear harness wiring
- Avoid slamming the liftgate to reduce wiring stress
Conclusion
If your 2011 Toyota 4Runner right rear brake light keeps going out, don’t just keep changing the bulb and hoping it sticks. This type of recurring issue usually involves a deeper electrical or physical fault, such as wiring, grounding, or a compromised socket.
By systematically checking each component — from bulbs to fuses to grounding — you can pinpoint and fix the real problem for good. Staying proactive with maintenance will ensure both your safety and vehicle compliance.
Have you had similar issues with your 4Runner? Share your fix or ask a question in the comments below — your experience might help someone else!
FAQs – 2011 Toyota 4Runner Right Rear Brake Light Keeps Going Out
Why does my 2011 Toyota 4Runner right rear brake light keep going out repeatedly?
This is often due to a combination of factors such as a faulty bulb, corroded socket, bad wiring, poor ground connection, or moisture inside the tail light housing. Diagnosing each component systematically will help pinpoint the root cause.
Is it safe to keep driving if my right rear brake light isn’t working?
No. Driving with a non-functional brake light is unsafe and illegal in most regions. It reduces visibility to other drivers and increases the risk of rear-end collisions.
What type of bulb does the 2011 Toyota 4Runner use for the rear brake light?
The 2011 4Runner typically uses a 3157 dual filament bulb for the brake and tail light functions. You can opt for 3157LL (long life) or upgrade to LED versions for better durability.
Can a brake light issue be caused by a blown fuse?
Yes. If a fuse controlling the brake light circuit is blown, it can cause one or more lights to stop working. Check the STOP (15A) and TAIL (10A) fuses in the fuse box.
How do I know if it’s a wiring problem?
If the light works intermittently, only lights up after bumps, or there’s no voltage at the socket with a known good bulb, it may be a wiring issue. Look for damaged wires, especially near the liftgate area.
Do I need to replace the whole tail light assembly?
Only if the socket is melted, internal components are damaged, or the housing is allowing water to get inside. Otherwise, replacing the bulb or repairing the socket and wiring might be sufficient.
How much does it cost to fix this issue professionally?
Depending on the root cause:
- Bulb replacement: $10–$25
- Socket repair: $30–$70
- Wiring repair: $100–$250
- Tail light assembly replacement: $125–$220
- Full diagnostic and repair at a shop: $150–$400+
No recalls exist specifically for the right rear brake light, but TSB-0043-11 mentions tail light wiring concerns. Check your VIN on NHTSA.gov or consult a dealer for full coverage.
Can I fix the brake light problem myself?
Yes, many owners resolve this issue DIY with basic tools like a multimeter, bulb tester, and screwdriver. Just follow a step-by-step troubleshooting approach starting with the bulb and working back to wiring.
How can I prevent the brake light from going out again?
- Use OEM-quality bulbs
- Apply dielectric grease on bulb terminals
- Check and secure ground wires
- Inspect the tail light housing for leaks or cracks
- Avoid slamming the rear liftgate, which can stress wires

When he’s not working his magic under the hood, Ethan Wilson is usually sharing his love for Toyota cars through his writing. Ethan’s got a special talent for breaking down complex car topics into easy-to-understand articles, making him a go-to source for Toyota enthusiasts everywhere.


